 Ending and BeginningI had my final critique for my graduate course in Mixed Media and Collage this week. As good as it felt to complete the course, I know I am not done making art in this series. After the critique on Wednesday, I rephotographed Bagged (since I drew back into it after washing the color off), and already played with recreating it digitally. I plan to have it printed larger and draw into again, like I did with the first one. I also transported a lot of my pieces to my father's house, where he will be matting and framing nearly the whole collection. I wasn't quite ready to have certain piece put behind glass, so I essentially gave him the ones I don't plan on touching. He already got Pumped matted and framed! Knowing the Perseverance series is going to end at some point, I have already figured out what I would like to play with next. I am going to try to photograph the various scars I have from previous surgeries, heavily manipulate the images in Photoshop, print them and draw and paint back into the prints. Other than calling it Scarred, I'm not entirely sure what I'm going for yet, and figure it will work itself out as I begin to play.
0 Comments
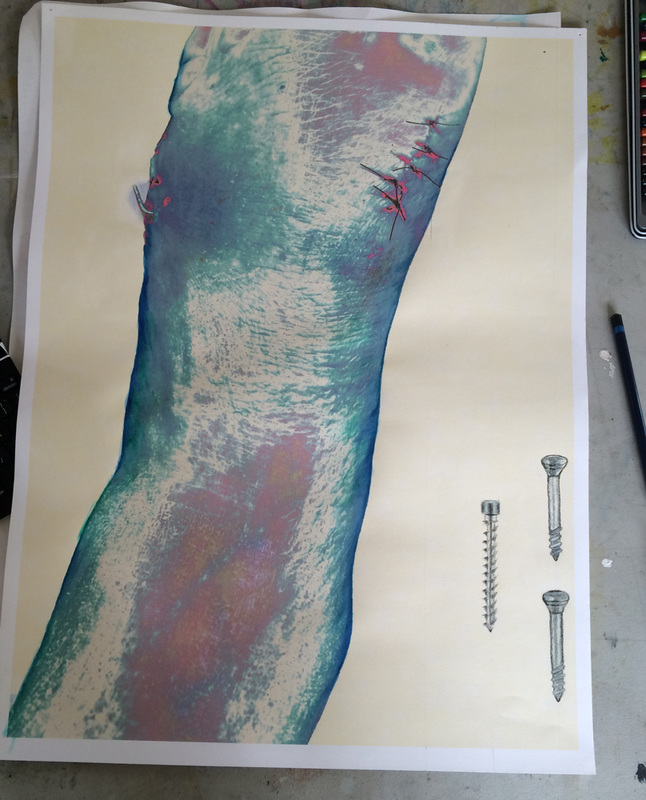
Stretch & ExploreAs I near the end of my Mixed Media and Collage graduate course, I have more ideas for the Perseverance work, but I am also interested in trying new methods. My classmate had tried sanding a photograph and ever since I saw hers, it was something I wanted to experiment with. I just happened to have an old 16x20" sepia tone beach photo that I was never planning on displaying as art, so I jumped right into sanding it. I kind of wish I had a practice version, as I saw what happened when I attacked the sky in the image. I just went with it and roughed out "clouds," then started hitting highlights on other parts of the photograph. I had tried printing an image of Rescue on tracing paper, but my inkjet printer desperately needs ink, so the image did not print as I had envisioned. I tried placing the image over several surfaces with no success, then randomly added it to the sanded photo and am kind of pleased with how it looks. I don't see this as part of my Perseverance series, but when I lay it all out pre-critique, I may have it nearby to see how it looks with the body of work. Finishing Grad School WorkI spent most of my weekend laying out all the pieces in Perseverance and fixing them up. I added charcoal with a brush to both Healed versions, and on the gray version I also gessoed over the charcoal to seal it and soften it. I washed as much paint off of Bagged as I could and then went back into it, adding more contrast and detail. I also played with some pieces that probably won't be in the Perseverance series, but maybe in a sequel. Screwed
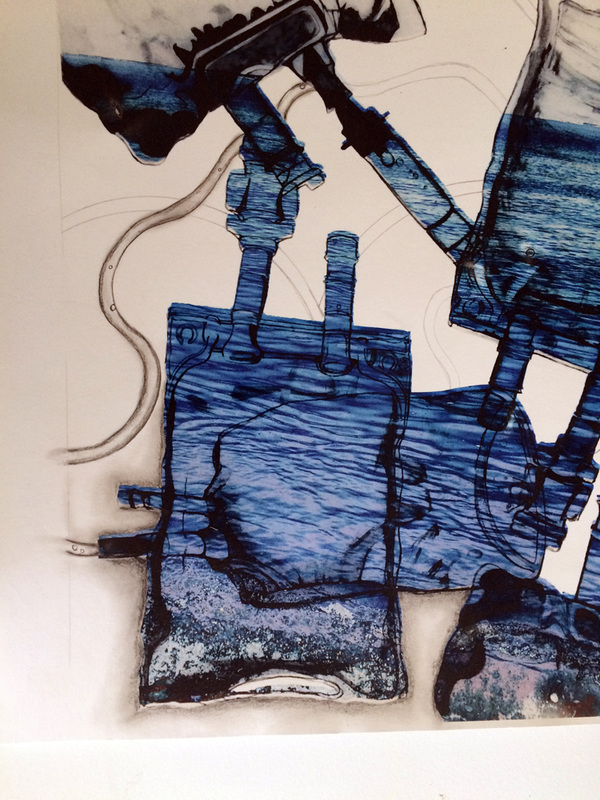
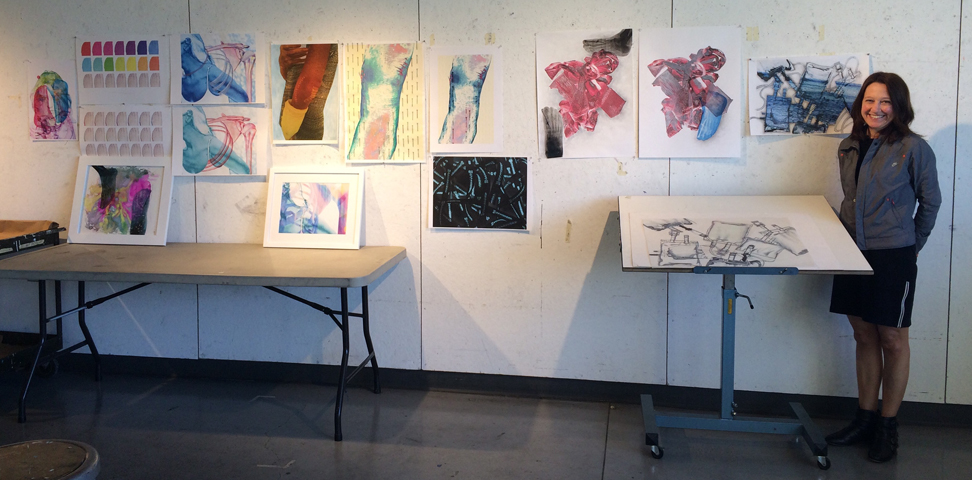
SquareSpaceI spent quite a bit of time revamping my professional artist website, GatorheadOriginal.com, this week. Not only did I clean it up and change over to a new template, I also create a few new pieces (edited old photos and digital art projects). Saltonstall Artist ResidencyDAY ONE: I arrived at Saltonstall shortly after 10am and was given a tour, time to set up my studio space, and lunch. After lunch, I spent the day focused on three projects: The Milagros, IV Bags, and Foot Scars. It was kind of difficult finding the right mindset today, as I seemed to feel rushed. I am hoping tomorrow will be better with larger chunks of time. DAY TWO: I woke up bright and early and have spent nearly 4 straight hours in the studio. Morning is definitely my most productive time. Making progress on all of my projects, but realizing how much I rely on a printer, and how not having access to one is holding me back from completing some pieces. DAY THREE: Again, more productive in the morning. I am amazed at how exhausting this is! I am physically and mentally drained, spending 8+ hours a day making art. I finished some pieces, then played with no plan...not good for me to do! My best work comes from planning and reflecting. And making many versions of one thing. DAY FOUR: Finally feeling like I am getting some work completed! I finished two versions of "Healed," and only have one more version I would like to try. I also prepped screws in Photoshop, so when I go home I can print and collage them onto one of the large feet I have. DAY FIVE: What an amazing experience! The cold temperatures and sunny skies made for a beautiful final morning at Saltonstall. I took a break from the Perseverance series I have been working on and played with illustrating an anatomical heart. I packed up and headed home around 1pm, and cleaned out my home studio, which is nothing compared to the luxurious space I just left. So grateful I had the opportunity and will go back again in the fall. 
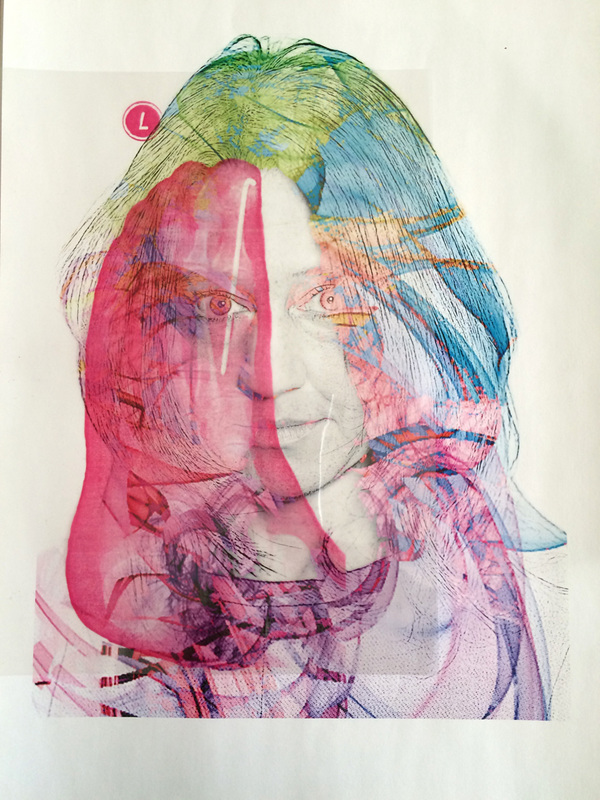
I added two layers of gesso to tone down the vibrancy of the background colors and emphasize the face. I am much happier with it now, and will work on drawing in the Milagros later. PumpedThis is just a fun piece, because I love the anatomical human heart image. I created it completely in studio methods, and then goofed around with it in photoshop. It really doesn't belong in the series, but I snuck my rescue boat in there. Maybe my perseverance series will have a sequel one day. Progress
Cyanotype
Photo Editing
Milagros
Post-Critique Reflection
Shoulder Anatomy
New Experiments
I had both of these printed with the intention of working back into them with studio materials. I found some of my foot x-rays that I had printed in color on acetate and just started to layer them to see how they would look. I have more multiple-exposure experiments, using an image of myself and non-objective digital images I created. I would like to print some of these and draw into them, or collage into them. ElbowI started to work on this piece, but am not sure what direction I am headed. I gessoed the background to soften it and then started to draw repetitive patterns on the shirt. Conceptually, I don't feel like the patterns have anything to do with the artwork, so I think I am going to use a soft turquoise pencil and layer text in the negative space. I don't want the text to be blatant, so I will write small and repeat the same phrase over and over, to make it more of a pattern.
After critique, I have a much better direction for this piece. Instead of random patterns, I have been studying and sketching surgical stitch patterns, surgical staples, and surgical tapes. I gessoed the background of the larger scale version I have, and am ready to mark the spaces for the patterns. Getting ready to teach post-production multiple-exposures to eArt and built a practice one to get my brain wrapped around the process again (3H). Collage & Mixed Media CourseI am working on what I am hoping becomes the final version of the shoulder piece. I colored almost all of the shoulder anatomy that I previously sketched onto tracing paper. I need to fix up the ribs and then cut it out. I also gessoed over the experimental turquoise version with the paint chips, to soften the shoulder anatomy, which now nearly blends into the background. Since I had the gesso out, I also added two coats of gesso over the bright turquoise on my Staples image. (4 H) New Ideas
Finishing works
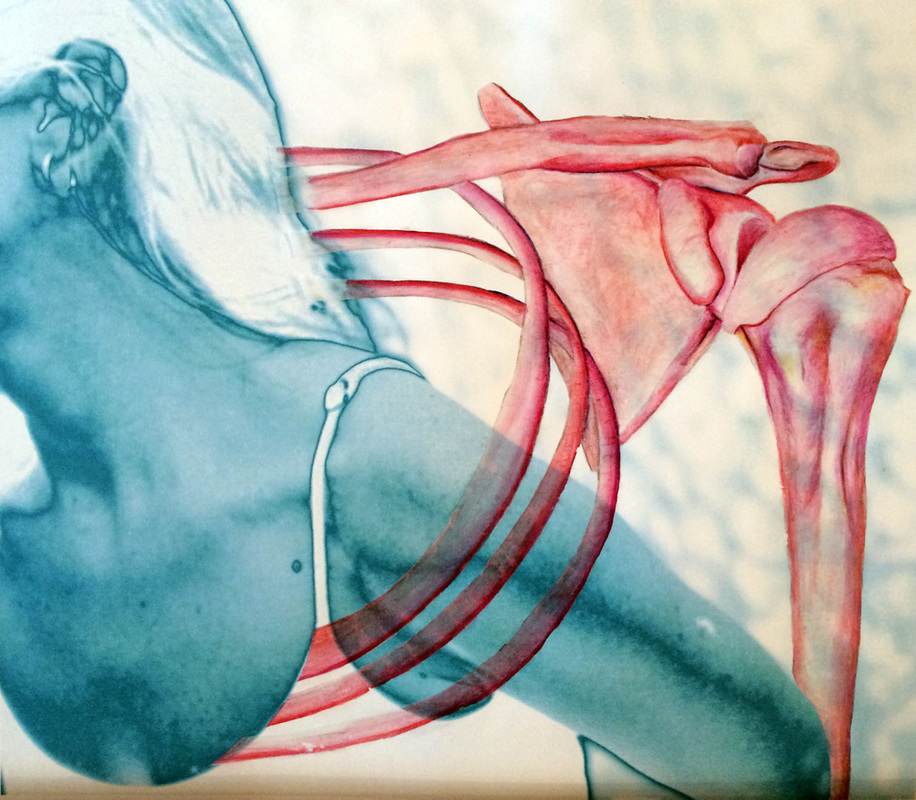
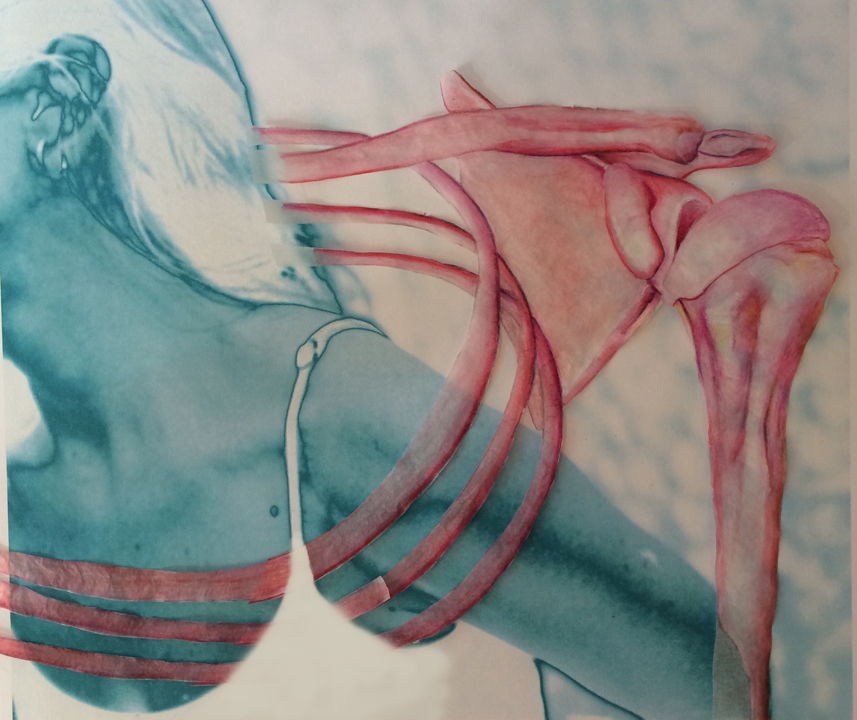
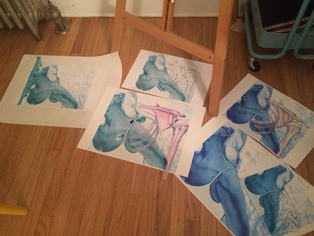
Shoulder Replacement ProcessAbove are process shots of the Shoulder Replacement piece in progress. I have drawn the shoulder anatomy on tracing paper, overlay-ed it onto the larger sized cobalt blue version, and began using a mix of Inktense pencils and acrylic paint. I really liked how in the practice version, the rings around my neck stood out against my skin. I am trying to lightly work on the rib cage that wraps around my arm to get the same effect. I also cut out the large scale version and am realizing I will need to go back into it to adjust colors. I did finally test out how it would feel to glue it together on the small version, using ModPodge (because I had it on hand). I actually liked how it was flexible to a point. If I didn't let it dry for too long, I was able to pick it up and rearrange it. The bone folder was the perfect tool to remove air bubbles and wrinkles. Once it dried, I ended up not liking it for some reason. I traced and cut out the shoulder anatomy once again and glued it over the first version, in an attempt to soften it. I still don't like it. Trying to find a solution, I began to lay out all the print versions I have and am playing with all sorts of solutions. One of my new favorites is a contour sketch of the shoulder anatomy and dramatic paint layers. Since it is on an 11x17" practice paper, I may as well assemble it just to see how it will look. I wanted this piece to be done for critique, but I don't think it will be at this point. (Studio Time 6H) Foot X-Rays
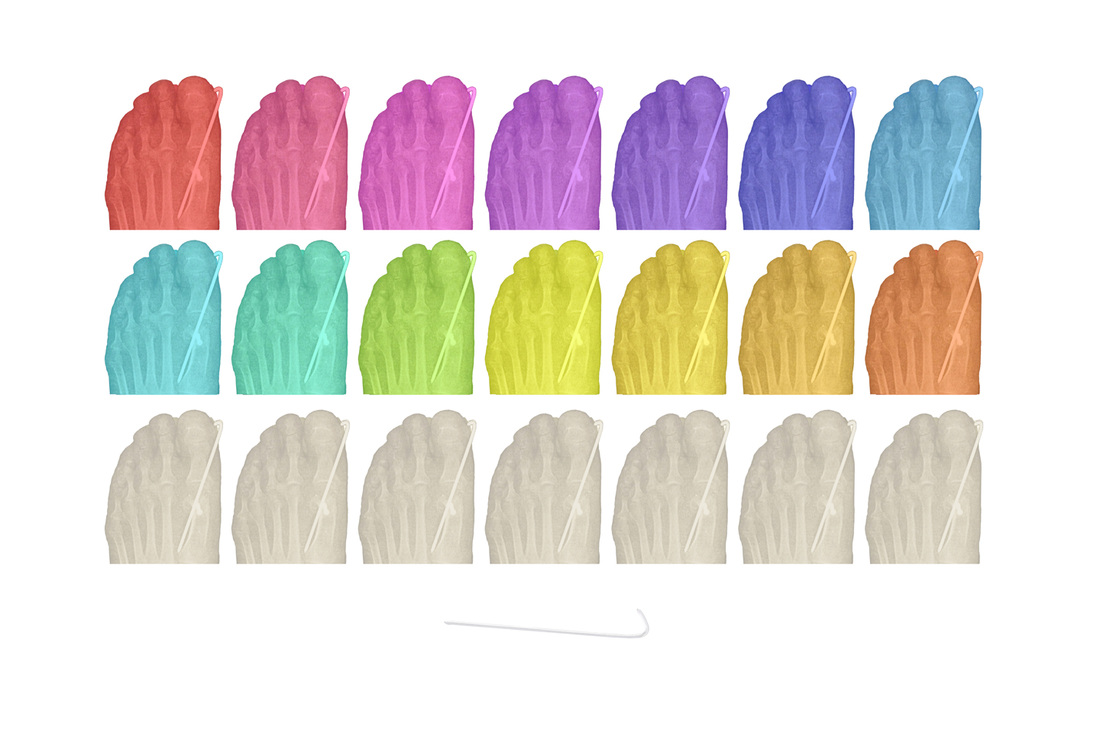
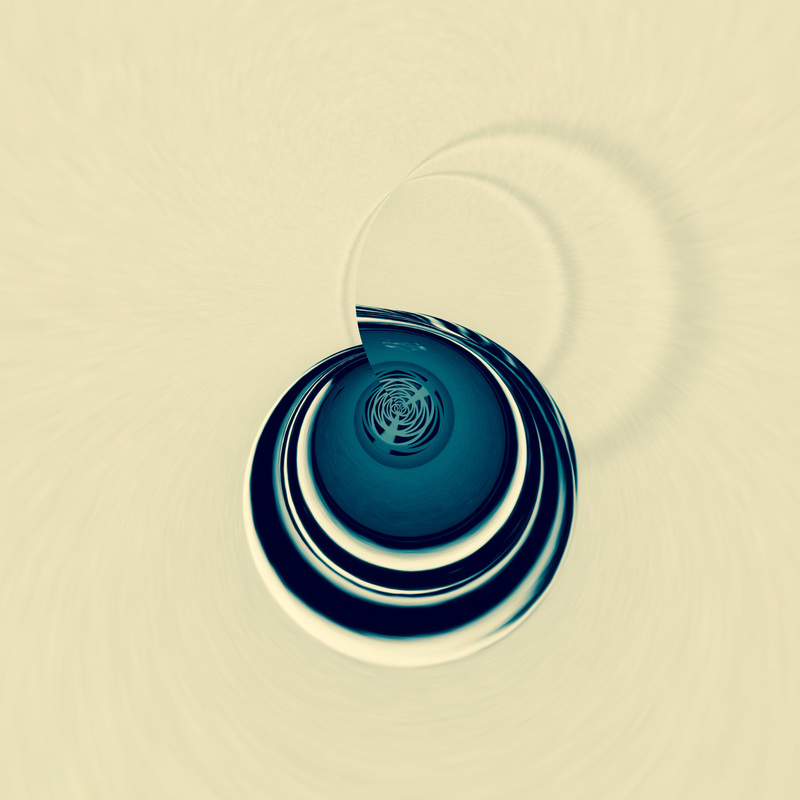
I went back to this one final time to experiment with how it would look with more of my toes visible. The image on the right has my full toes visible, while the image to the left has my toes cropped. I prefer the toes cropped because I feel it makes it less obvious that it is my foot x-ray. Many people have assumed it was some kind of shell at first site, and then realize it's actually a foot x-ray upon closer examination. The image with my toes clearly makes it look like a foot x-ray. So even though I took the time to make it, I still prefer the cropped version, which means I can now investigate getting it printed larger and on a good quality paper. (3H to rebuild one last time, with alternate versions) Foot X-Rays Final VersionsNew experimentsWorking with my advanced group, I challenged myself to create a piece solely on the iPad. I used several iPad apps (Photoshop Express, Adobe Draw, and Brushes) to achieve the end result. I would call this a digital collage, considering it is made up of my photograph, a digital painting, and an edited skeleton image. I have started a unit that applies what I am learning in this Graduate course to my Advanced Art group (a mix of juniors and seniors in high school). The objective is to mix studio and digital methods, employing the use of iPhones and iPads as the primary art making tools. Because the students are all exploring diverse concepts in their work, the main objective is focused on the use of inventive medium. What I have discovered is PicsArt app (even the free version) is amazingly similar to Photoshop. While I have not fully explored it, I have started to play with it more. I love that some of the powerful features Photoshop offers have been recreated on a portable device, like the iPad. Another amazing app that is giving me ideas for future artworks is Roll World (also free). It's primary purpose is to make Tiny Planets (which I teach my digital art students how to do in Photoshop), but I am using Roll World unconventionally to create abstract or non-objective compositions. I can see possibly printing out dozens of these and collaging them. This may be where I can use my artist inspiration of Michael Mapes. I love how he creates images out of smaller objects and images. I might use Roll World to create the small images that will make up the larger whole image. (iPadology 2H) Ideas for Future works
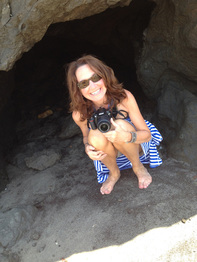
Planning & CreatingAfter working many hours on the Typographic Self-Portrait, I had another idea for incorporating type into an artwork. My husband took an image of me crouching in the entrance to a small beach cave on Martha's Vineyard island. Seconds after he took the photo (in the time it took him to look back at the image on his phone screen), the upper portion of the cave broke off and fell on me, as I was in the process of standing up. The impact coupled with the fact that all of my weight was on my left foot as I was getting up, snapped my big toe and second toe, breaking the bones at the metatarsal joints. I also fractured by right elbow when I braced myself during the fall. Below are ideas I have for this image.
Shoulder ReplacementI was initially very excited to work on this, after printing a test image and falling in love with the intense cobalt blue ink. However, when I went to get it professionally printed, the ink was a calmer faded turquoise, which is workable, but not as striking as the test image. I am now testing out how I want to add the shoulder anatomy into the image. I definitely want the ribcage wrapped around the arm, and possible in strands around the neck. However, I am having second thoughts about how to bring the shoulder in. I tried using Derwent's Inktensese pencils on tracing paper, but was unhappy with the quality of the tracing paper. I do like the idea of collaging the shoulder anatomy in, but will try a thicker paper. The tissue was wrinkling. I am also going to experiment with permanent marker on acetate for the shoulder. (3H) I ended up getting it reprinted and adjusted the color so I could have the original blue I liked so much. I also finished the tissue paper version, and while I am happy with how it came out, I am now also experimenting on a piece of vellum, because it will lay flatter. However, the inktense pencils don't do so well on the vellum, so I have been using more paint. I also tried getting this image printed larger, but the prints won't be ready until next week. Ultimately, I would like to use the larger version as my final version. (3H) Artist Inspiration (Gerard Richter)I have an artist crush on Gerard Richter. I love how he takes a photograph and masterfully smears paint over it, leaving elements revealed (Overpainted Photographs series). The juxtaposition of the abstract marks with paint, over the realistic image in the photograph merge two of my favorite mediums (photography and painting). Not that I am anywhere near Gerard Richter in terms of talent and success, but I would like to think I have a knack for expressive color use in Photoshop. Not wanting to completely copy Richter, I edited some of my photographs with the intent to play with them in the studio, mixing paint onto them. I might also print some on acetate, to again, try something I haven't seen Richter do (yet).
Also, with some of my images having intense color, I think I will play with monochromatic colors or grayscale paints. Time spent finding images to play with and photoshopping (1 H). Actually practicing "Richter-style" paint over the photographs (1H). It was horrible and did not work well. |